How to Create a Post in WordPress
Creating a post in WordPress is a simple yet essential process for adding content to your website. Follow the steps below to create a new post:
1. Log into Your WordPress Dashboard
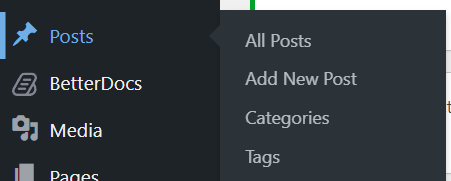
2. Navigate to the Posts Section
- On the left-hand menu, click on Posts.
- Click on Add New. This will take you to the post editor screen.
3. Enter a Title for Your Post
- At the top of the page, there’s a text field labeled Add Title. Enter the title of your post here. This will also be used as your post's URL.
![]()
4. Write Your Post Content
- In the content editor area below the title, you can start writing your post.
- WordPress uses the Block Editor, which allows you to add different content types (text, images, videos, etc.) in blocks.
- You can add a block by clicking the + icon or typing / in the editor and choosing the type of content block you want to use (Paragraph, Heading, Image, List, etc.).
5. Format Your Post
- Use the formatting options in the toolbar to adjust text style (e.g., bold, italic), align text, or create links.
- You can also add images or media by clicking the + icon and selecting the appropriate block (Image, Gallery, Video, etc.).
6. Set Categories and Tags
- On the right-hand side, you’ll find options to categorize your post:
- Categories help organize your content into broad sections. You can select an existing category or create a new one.
- Tags are optional but help in further organizing content with more specific keywords.
7. Set a Featured Image (Optional)
- In the right sidebar, click on Set Featured Image to choose an image that will represent your post in listings and on the post itself.
8. Preview Your Post
- Before publishing, it's a good idea to preview how your post will look to your visitors. Click on the Preview button at the top-right corner to see a live preview of your post.
9. Publish Your Post
- Once you are satisfied with your post, click on the Publish button at the top-right corner.
- WordPress will ask you to confirm by clicking the button again. After this, your post will go live on your website.
10. Additional Options (Optional)
- Save as Draft: If you’re not ready to publish yet, you can save your post as a draft and return to it later.
- Schedule a Post: You can set a specific time and date for your post to be published. This is helpful for planning future content.
- Post Visibility: Set your post to be public, private, or password-protected depending on your needs.


