How to Redirect a Domain Using cPanel
In the world of web hosting, domain redirection is an essential feature for many reasons. Whether you're rebranding your website, switching to a new domain, or consolidating multiple websites into one, domain redirection ensures that users and search engines are automatically directed to the correct website without encountering broken links or outdated content. A redirect can either be temporary or permanent, depending on your needs.
With cPanel, setting up a domain redirect is easy, allowing you to manage your website’s traffic flow seamlessly.
Why You Might Need a Domain Redirect
Here are some common reasons why you might want to redirect a domain:
- Domain Change: You've acquired a new domain name and want to transfer visitors from the old one to the new one.
- Rebranding: Your business name has changed, and you want to ensure that users who visit the old domain automatically end up on the new domain.
- Consolidation: You have multiple websites or domains and want to merge traffic from several domains into one.
- Fixing URL Structure: Perhaps you've changed your website’s structure, and specific URLs now need to be directed to new pages.
- Handling Multiple Versions of a Website: Redirecting the
wwwversion of a site to the non-wwwversion (or vice versa), or redirectinghttptraffic tohttpsfor better security.
In this guide, we'll cover all the steps involved in setting up a domain redirection using cPanel.
Redirect a Domain Using cPanel
Step 1: Log into cPanel
To begin, you need to access your cPanel account:
- Open your web browser and navigate to your cPanel login page. Usually, the URL looks like
https://yourdomain.com/cpanelor is provided by your hosting provider. - Enter your Username and Password.
- Click the Log In button to enter your cPanel dashboard.
Step 2: Locate the Redirects Feature
Once logged in to cPanel, the next step is to find the domain redirection feature:
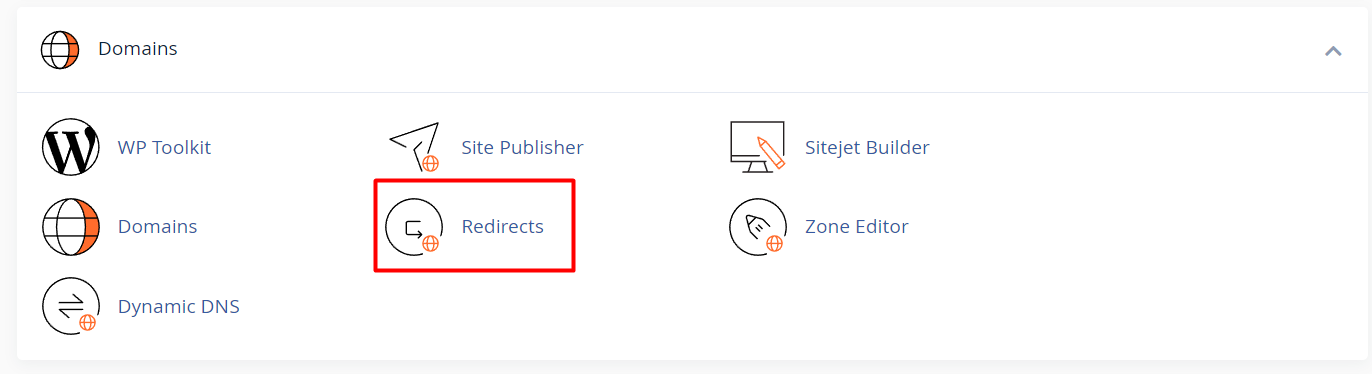
- Scroll down until you find the Domains section.
- Click on the Redirects option. This will take you to the page where you can set up your domain redirection.
Step 3: Select the Type of Redirection
When you arrive on the Redirects page, you’ll have the option to choose between two types of redirection:
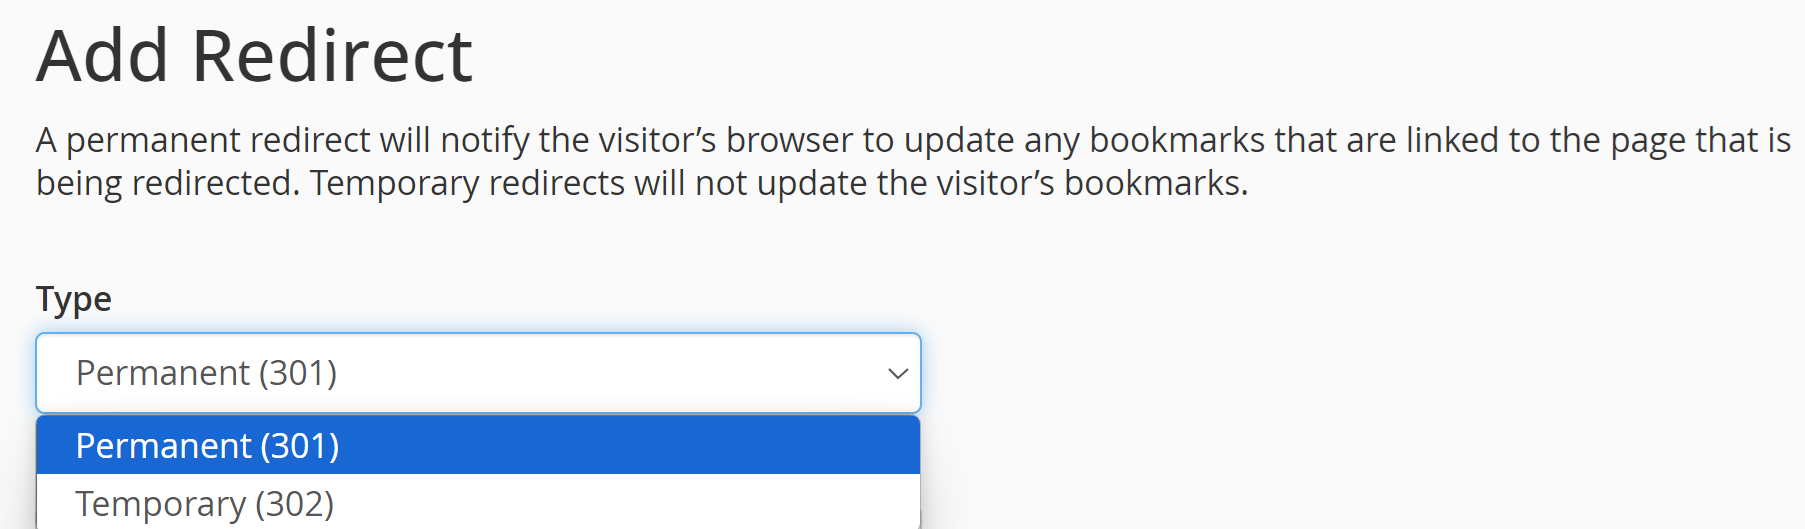
- Permanent (301): This type of redirect is typically used when the change is permanent. Search engines will index the new URL, and users will be permanently redirected.
- Temporary (302): If the redirection is only temporary and you plan to bring back the old domain or URL, use this option. Search engines won’t index the new URL as a permanent change.
Tip: If you're unsure, it’s generally best to use the Permanent (301) redirect, especially if you're changing domains permanently or restructuring your site.
Step 4: Choose the Domain to Redirect
-
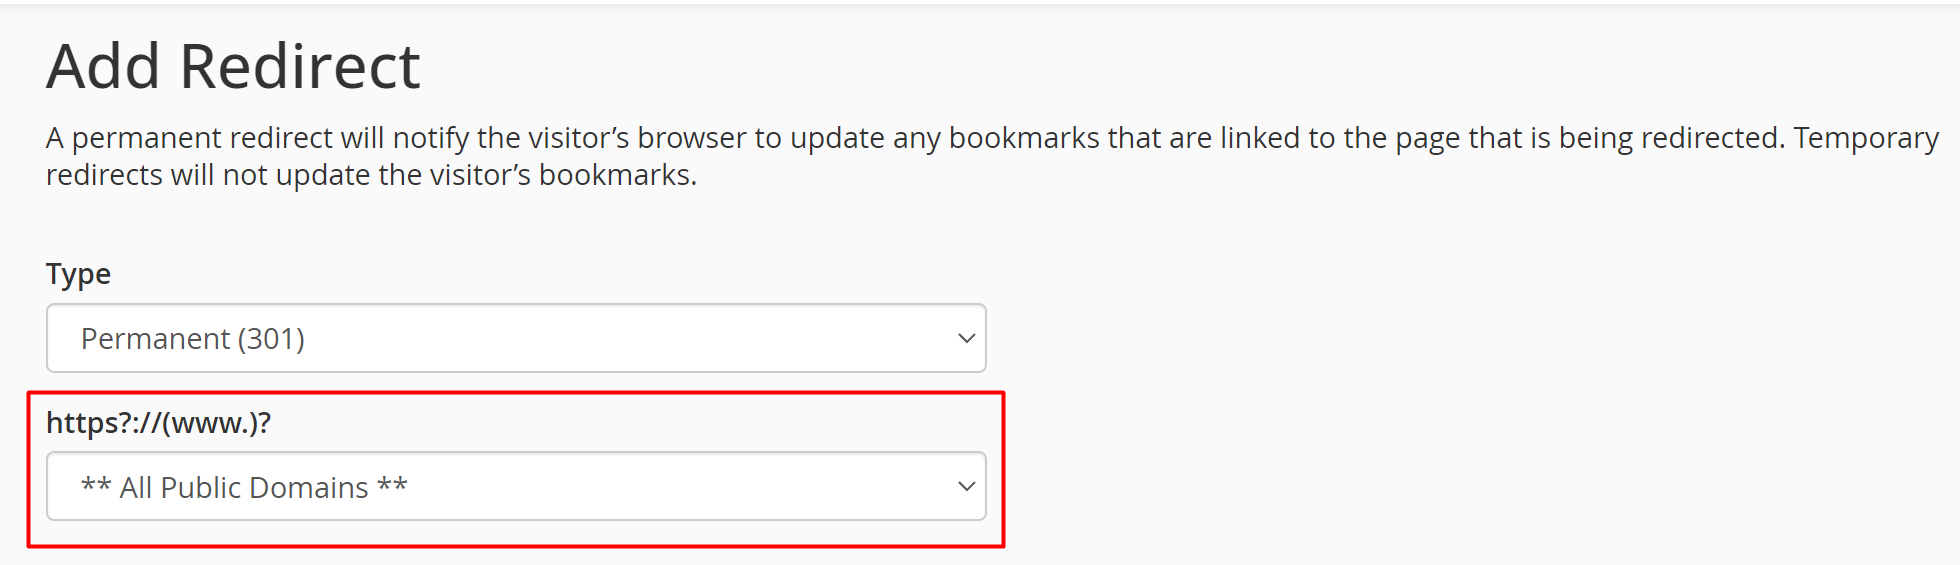
In the http://(www.)? dropdown, select the domain you want to redirect.
- If you only want to redirect specific pages or subdirectories (e.g.,
https://yourdomain.com/page1), you can specify the path in the text box next to the domain selection.
- If you only want to redirect specific pages or subdirectories (e.g.,
-
If you want the redirect to apply to all versions of the domain (with or without “www”), select the "Redirect with or without www" option.
Step 5: Enter the Destination URL
- In the Redirects to field, input the full URL where you want to redirect visitors. This can be another domain (e.g.,
https://newdomain.com) or a specific page on your site (e.g.,https://newdomain.com/page1).
Note: Ensure that the destination URL begins with the appropriate protocol (http:// or https://), depending on the setup of the destination site.
Step 6: Redirect with or without "www"
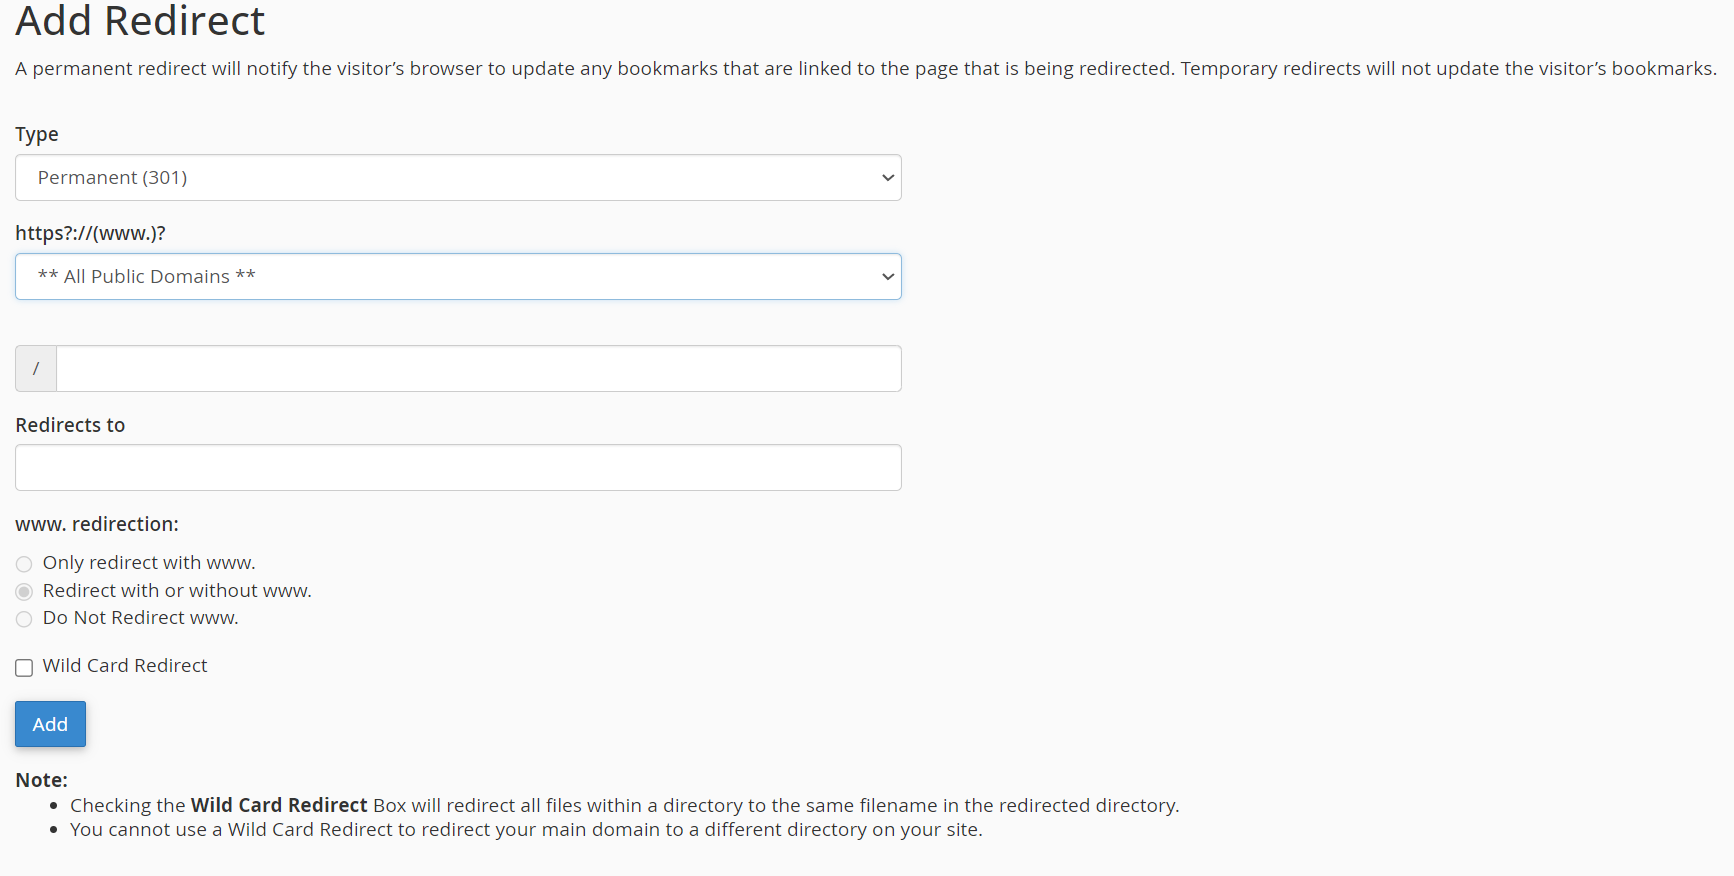
cPanel gives you options on how you want the redirection to behave with "www" in the URL. You can choose between:
- Only redirect with www: The redirect will only work if visitors access the domain with “www.” (e.g.,
www.yourdomain.com). - Redirect with or without www: The redirect will work whether or not the visitor uses "www" (e.g.,
www.yourdomain.comandyourdomain.comwill both redirect). - Do not redirect www: The redirect will not apply to visitors using "www" in the URL.
Step 7: Enable Wild Card Redirect (Optional)
If you want every file or page under your domain to redirect to the same location on the new domain, use the Wild Card Redirect option. For example, if yourdomain.com/page1 should redirect to newdomain.com/page1, select the Wild Card Redirect checkbox.
Example:
- If you use Wild Card Redirect, any subdirectory or file under your old domain will map to the new domain in the same structure.
- Without Wild Card Redirect, only the base domain will be redirected.
Step 8: Add the Redirect
Once you’ve filled out all the fields, click the Add button to create the redirect. A confirmation message will appear, indicating that the redirection has been successfully added.
Step 9: Check the Redirection
Now that you’ve set up the redirect, it’s essential to test it:
- Open a new tab in your browser.
- Enter the old domain or URL you just redirected.
- You should be automatically redirected to the new domain or page you specified.
Advanced Options and Considerations
Redirecting HTTP to HTTPS
It’s essential to ensure that all your website traffic is directed through a secure connection, especially if your site has an SSL certificate. You can configure this in cPanel as part of your redirects setup by ensuring that the destination URL uses https://.
SEO Considerations
If you’re permanently moving a domain, a 301 redirect is the best choice for maintaining your SEO rankings. Search engines will understand that the old URL has permanently moved, and they will transfer the ranking power to the new URL.
Avoid Redirect Loops
Be careful not to create a redirect loop by accidentally redirecting a domain back to itself. This can cause issues for both users and search engines. Always double-check your input and test the redirection to ensure it works as expected.


