How to Manage DNS Records in cPanel
Managing DNS records in cPanel is a crucial aspect of controlling how your domain interacts with web and email servers. Whether you're updating your website's IP address, setting up email routing, or configuring subdomains, understanding DNS management ensures that your domain functions properly. This guide provides a detailed breakdown of the necessary steps, making it easy for users of all experience levels to modify their DNS settings efficiently. Follow the instructions below to confidently manage your DNS records and keep your domain running smoothly.
Step 1: Login to cPanel
Before you can manage your DNS records, you need to log in to cPanel. Here’s how:
- Open your browser and enter your cPanel URL (typically,
yourdomain.com/cpanel). - Enter your cPanel username and password.
- Once logged in, you’ll see the cPanel dashboard.
Step 2: Locate the Zone Editor
- In the Domains section, locate and click on Zone Editor.
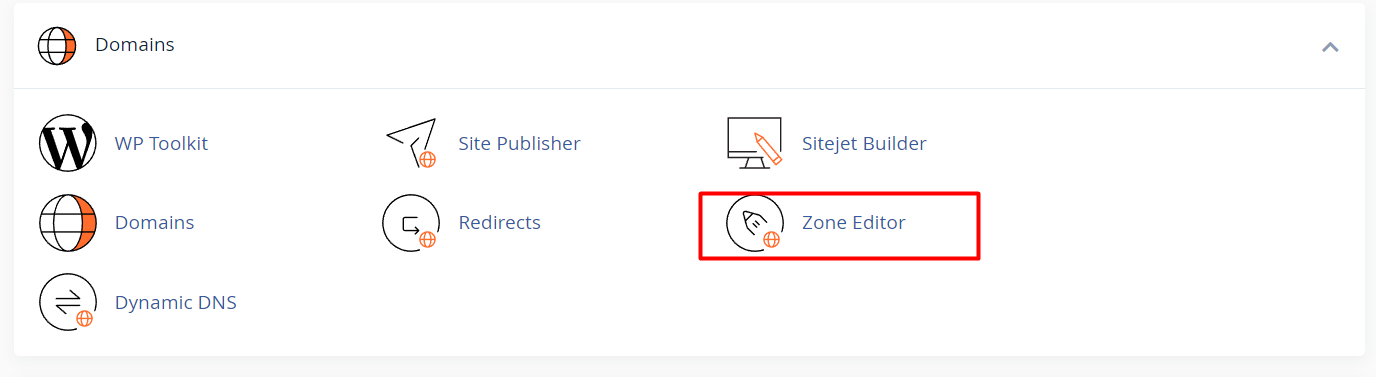
- This tool allows you to manage DNS records for all the domains associated with your account.
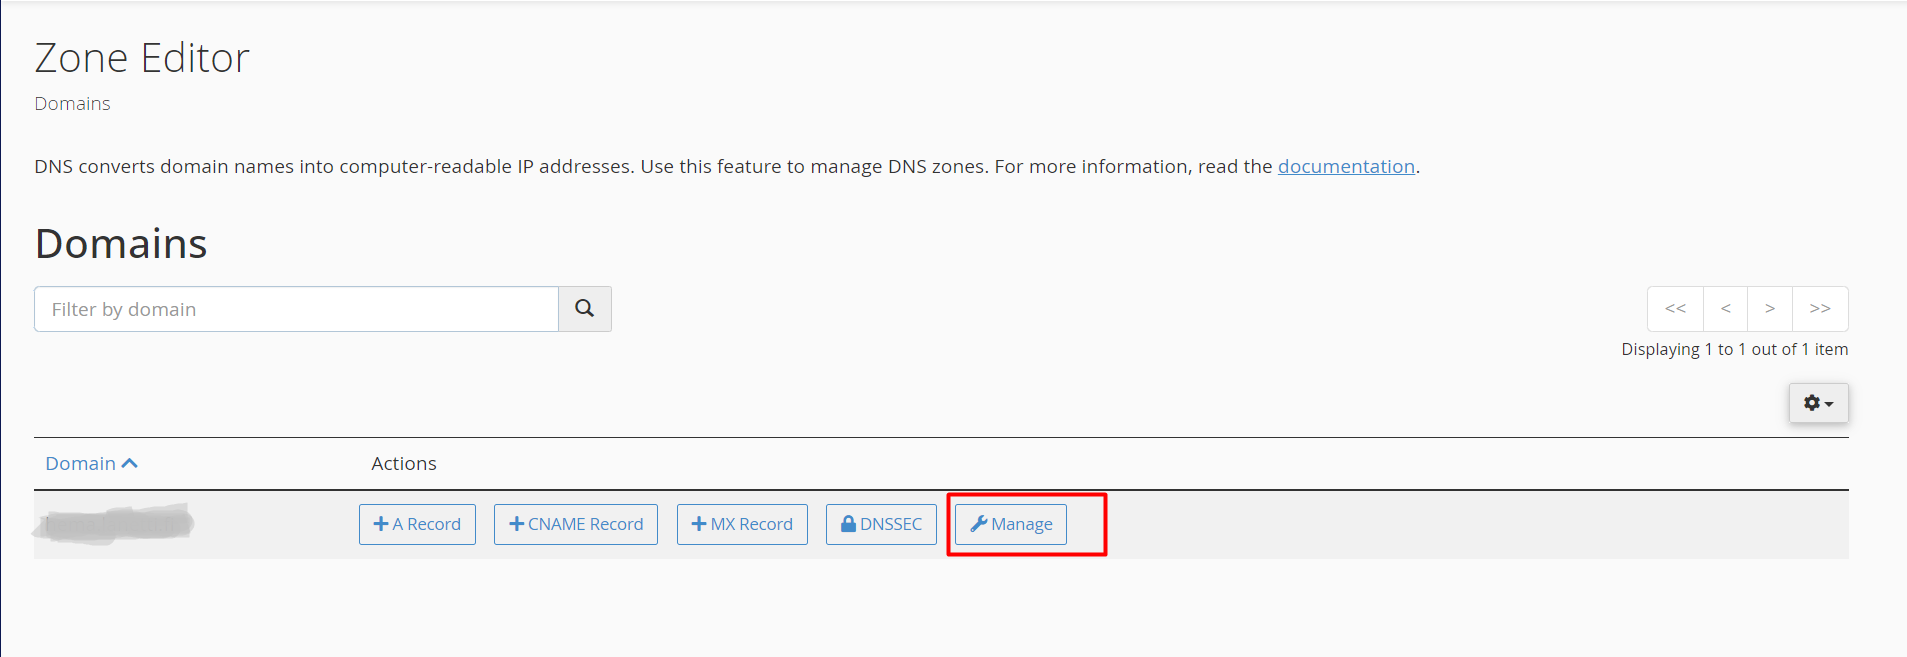
Step 3: Select the Domain
- A list of your domains will be displayed. Identify the domain for which you want to manage DNS records and click on Manage.
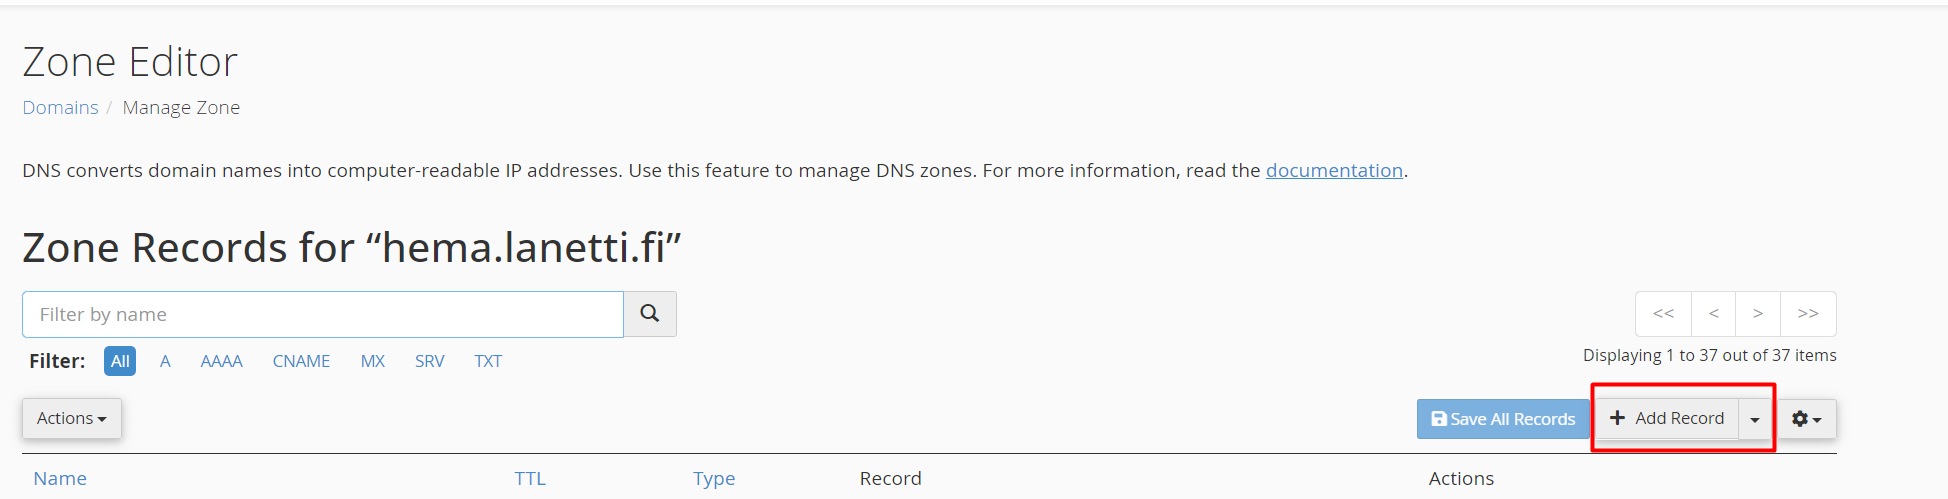
Step 4: Viewing Existing DNS Records
- You will now see a list of all the DNS records for the selected domain, including A, CNAME, MX, and TXT records.
- Each record displays the name, type, and destination, giving you an overview of how traffic is being routed.
Adding, Editing, and Deleting DNS Records
Adding New DNS Records
- Click the + Add Record button at the top right corner of the page.
- In the form that appears, select the type of record you want to add from the dropdown menu. Options include:
- A Record: Enter the domain or subdomain and the target IP address.
- CNAME Record: Enter the domain or subdomain and the target alias.
- MX Record: Enter the priority and the target mail server.
- TXT Record: Enter the domain and the text (often used for verifying domain ownership).
- Click Save Record to add the new DNS entry.
Editing Existing DNS Records
- Locate the DNS record you want to modify.
- Click the Edit button next to the record.
![]()
- Update the details as needed (for example, changing the IP address in an A Record or the target in a CNAME record).
- Click Save Record to apply the changes.
Deleting DNS Records
- Find the DNS record you wish to remove.
- Click the Delete button next to it.
![]()
- Confirm the deletion to remove the DNS record from your domain.
Common DNS Record Changes
Updating the A Record for Your Domain
If you are changing web hosts or moving your website to a new server, you will likely need to update the A Record. To do this:
- Find the A Record for your domain (it will usually be marked as
@or the main domain name). - Click Edit.
- Change the IP address to the new server's IP address.
- Save the changes and wait for DNS propagation.
Adding a CNAME for a Subdomain
If you want to point a subdomain (like blog.yourdomain.com) to a different domain, follow these steps:
- Add a CNAME Record.
- For the Name field, enter your subdomain (e.g.,
blog). - In the Target field, enter the destination domain (e.g.,
example.com). - Save the record.
Setting Up MX Records for Email Hosting
If you are setting up email services for your domain, you may need to configure MX Records:
- Find the existing MX records and delete them if necessary.
- Add a new MX Record.
- Enter the priority number (typically, a lower number has higher priority) and the mail server address provided by your email hosting provider.
- Save the changes.
Additional Tips and Best Practices
Understanding DNS Propagation
When you make changes to DNS records, the changes are not instant. DNS propagation can take up to 24-48 hours to fully update across the internet. This is because DNS servers around the world cache DNS information, and it can take some time for them to receive the updated records.
Backup DNS Settings
Before making any significant changes to your DNS records, it’s always a good idea to create a backup. Simply take a screenshot or note down the current records so that you can revert back if needed.
Use the Right TTL Settings
TTL (Time to Live) determines how long a DNS record is cached by DNS servers. Shorter TTLs can speed up propagation but may cause increased DNS lookup traffic. For most users, a TTL of 14400 seconds (4 hours) is standard.


