Installing WordPress with cPanel: Comprehensive Guide
cPanel offers multiple ways to install WordPress, each suited to different levels of technical expertise. Below is a comprehensive guide covering the most common methods we offer.
1. Using Softaculous (One-Click Installer)
Softaculous is a popular one-click installer that simplifies installing WordPress with minimal effort.
Step 1. Login to cPanel
Step 2. Find Softaculous: Under the “Software” section, click on “Softaculous Apps Installer.”
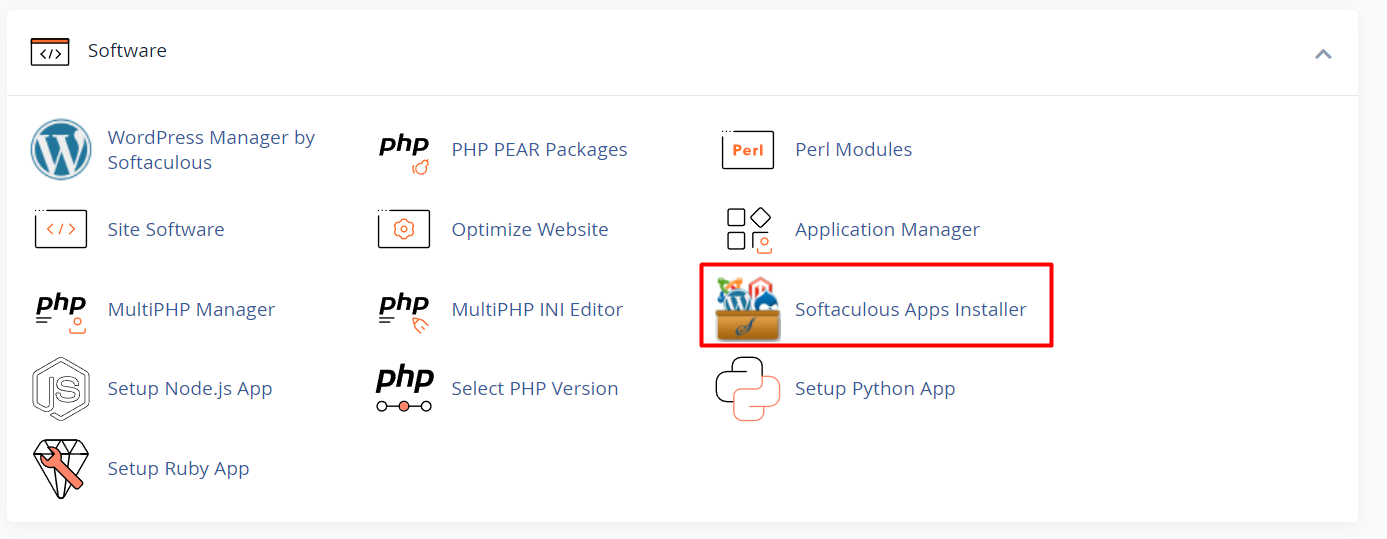
Step 3. Select WordPress: Once in Softaculous, locate and click on the WordPress icon.
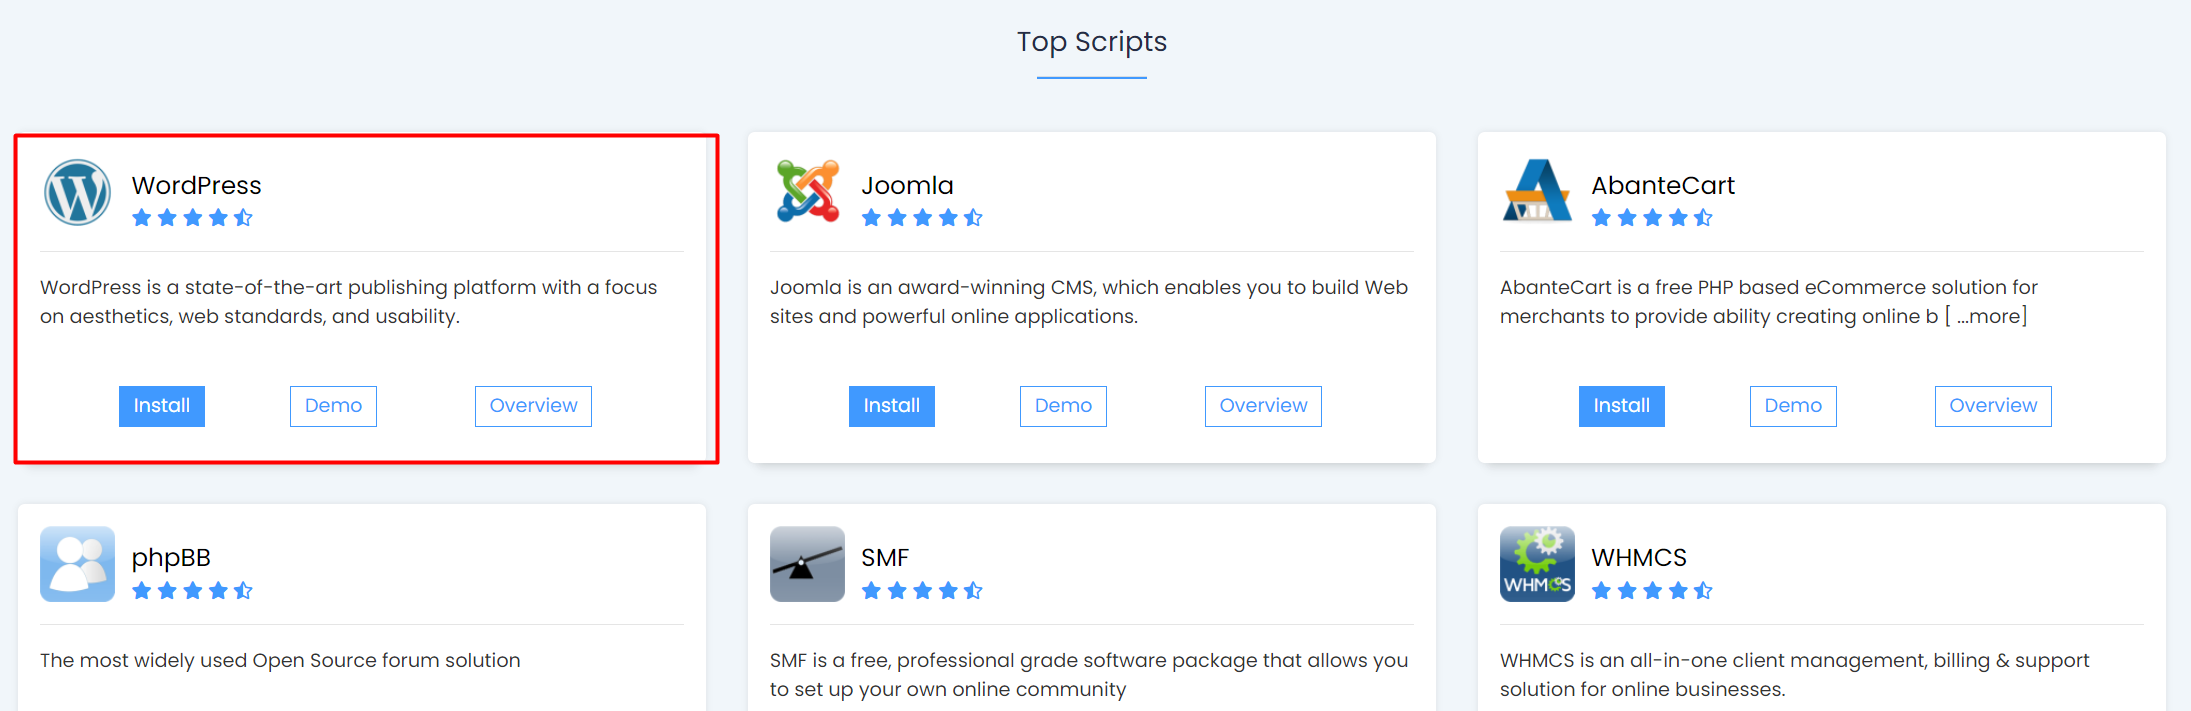
Step 4. Click ‘Install Now’: This will take you to a form where you’ll input all necessary details.
Fill in details:
Choose your domain (e.g., www.example.com).
- Set up your site name, admin username, password, and email.
- Choose your language and any additional plugins if required.
Click ‘Install’: The installation process will begin and should complete in a few minutes.
Access Your WordPress Site: After installation, you’ll receive a link to log in to your WordPress admin panel.
Advantages:
Extremely user-friendly, ideal for beginners.
Minimal input required.
Automatic setup of databases.
2. Manual Installation of WordPress
For users who prefer greater control or don’t have access to automatic installers, manual installation is another option.
Step 1. Download WordPress: Go to the official WordPress website and download the latest version of WordPress.
Step 2. Upload WordPress to cPanel:
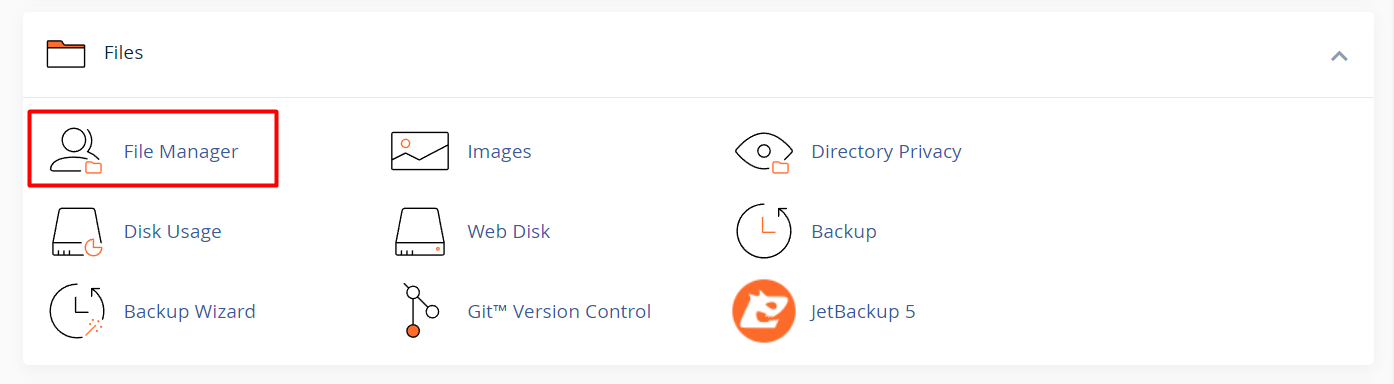
Go to “File Manager” in cPanel.
Navigate to your root directory (usually public_html).
Click “Upload” and select the WordPress zip file you downloaded.
![]()
Once uploaded, extract the file.
Step 3. Create a Database:
In cPanel, navigate to the “MySQL Databases” section.
Create a new database and a database user.
Assign the user to the database and give it “All Privileges.”
Step 4. Configure WordPress:
Go to your domain (e.g., www.example.com).
The WordPress setup wizard will appear.
Enter your database details (database name, username, and password).
Complete the setup, adding your site’s title and admin details.
Complete Installation: Once you’ve entered the required information, WordPress will install, and you’ll be directed to the login page.
Advantages:
- Full control over the installation process.
- Good learning experience for those who want to understand the backend.
3. Using cPanel’s Site Software
Step 1. Log into cPanel
Step 2. Go to Site Software: Under the “Software” section, click on “Site Software.”
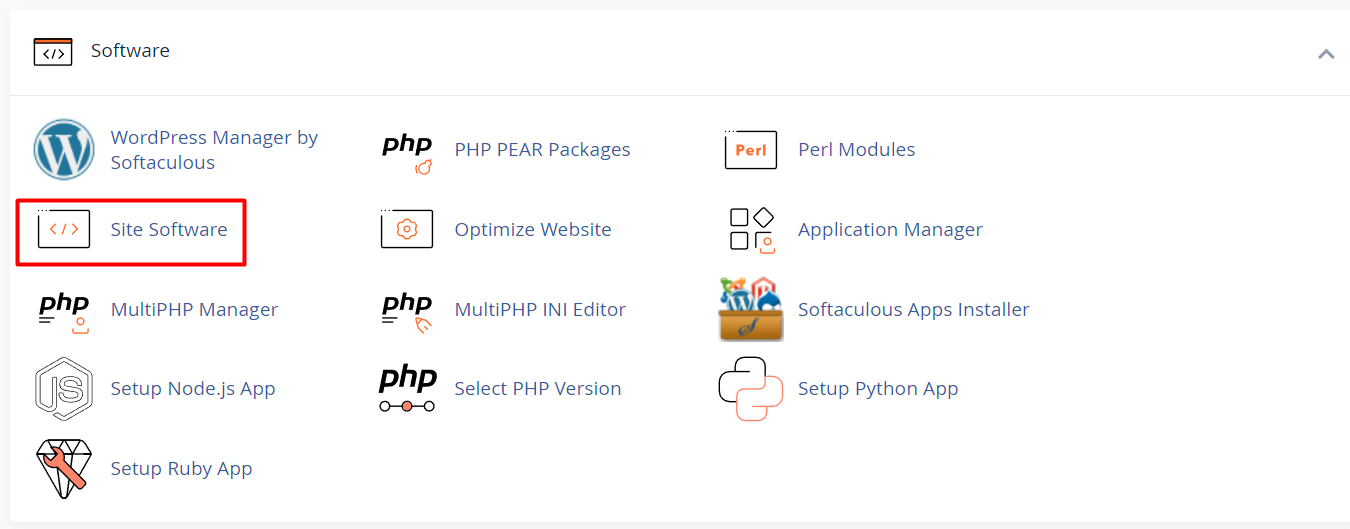
Step 3. Select WordPress: Look for WordPress in the list and click it.
Input Details:
Choose your domain.
Enter your admin username, password, and site information.
Install: Click “Install,” and cPanel will automatically handle the setup.
Advantages:
Simplified, with fewer steps compared to manual installation.
Usually pre-configured for cPanel environments.
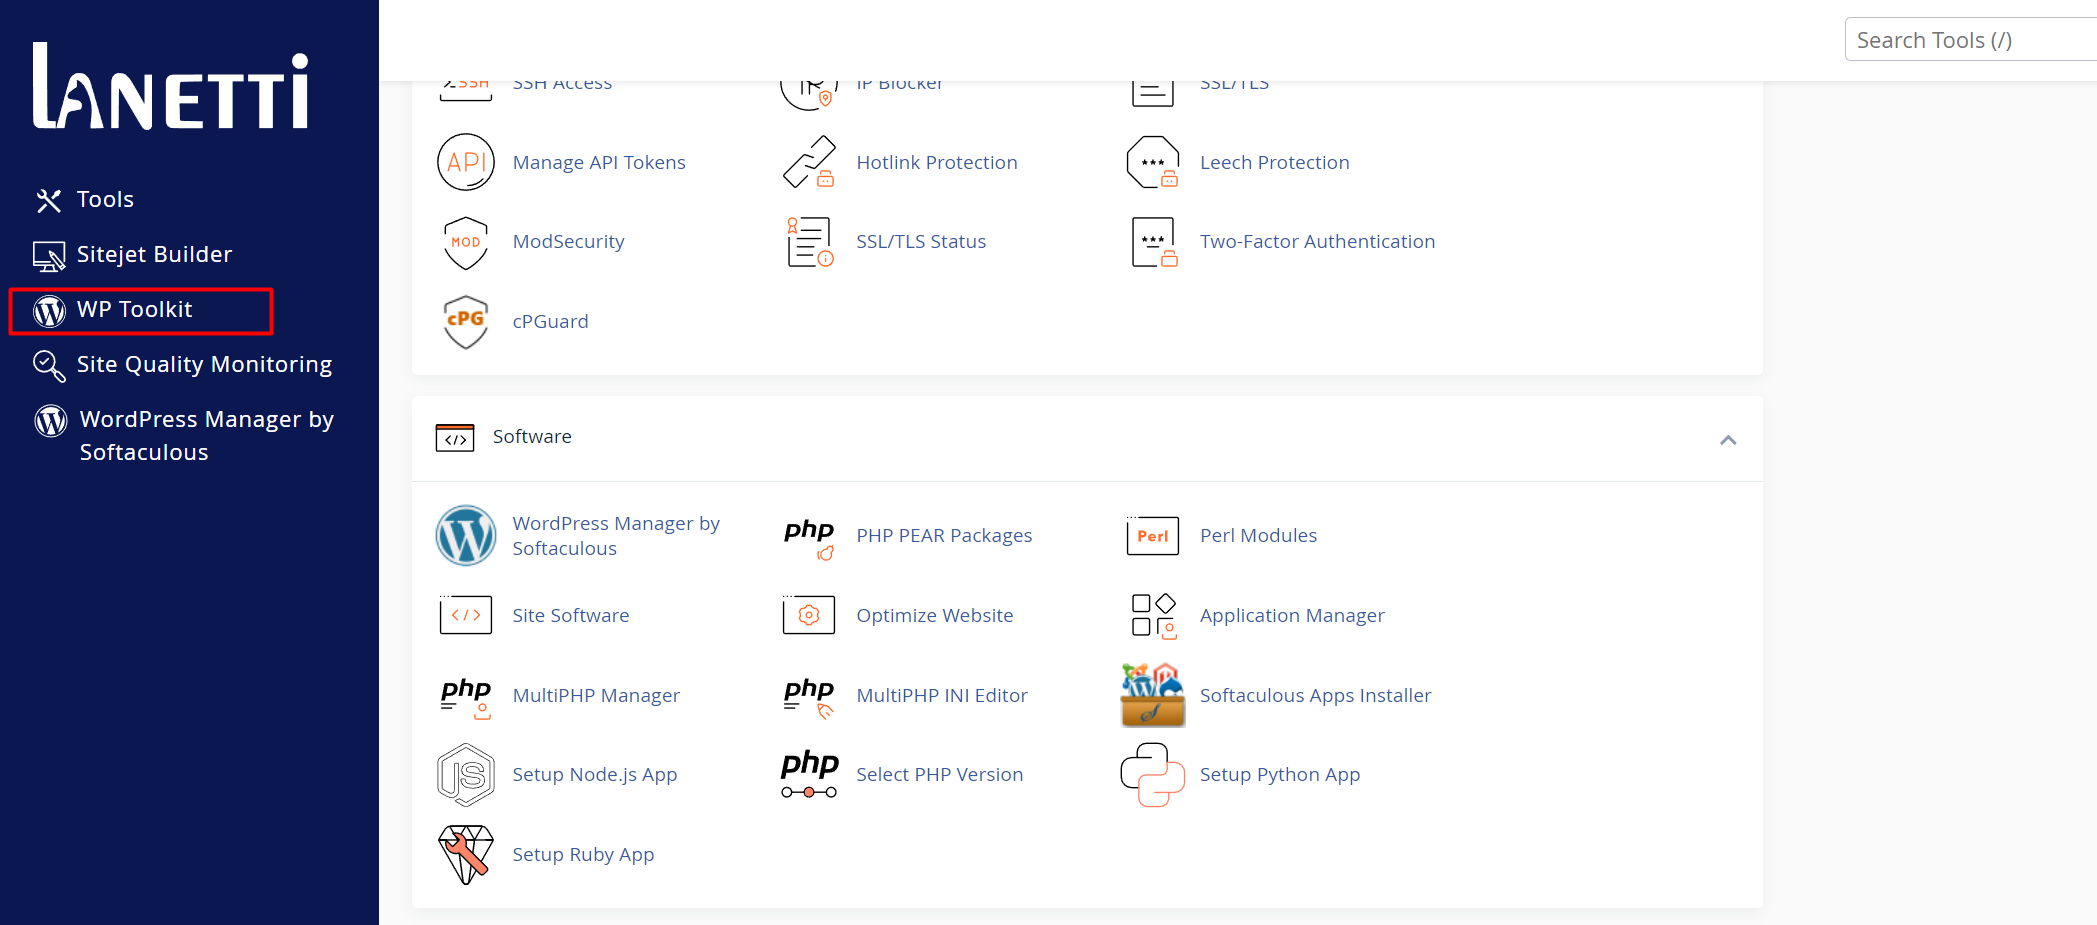
4. Using WP Toolkit
If your cPanel version includes WP Toolkit, this tool makes it easier to install and manage WordPress sites.
Step 1. Login to cPanel
Step 2. Find WP Toolkit: Under the “WordPress” section, click on “WP Toolkit.”
Step 3. Start Installation: Click “Install” to begin the WordPress installation process.
Step 4. Select Domain:
Choose the domain or subdomain where you want to install WordPress.
Step 5. Customize Settings:
You can adjust the admin username, password, email, and other site settings.
Alternatively, proceed with the default settings for a quicker installation.
Step 6. Click ‘Install’: WP Toolkit will install WordPress and give you access to a dashboard where you can manage your site’s features.
Advantages:
- Streamlined management for multiple WordPress installations.
- Additional tools like staging, cloning, and security features for WordPress.


